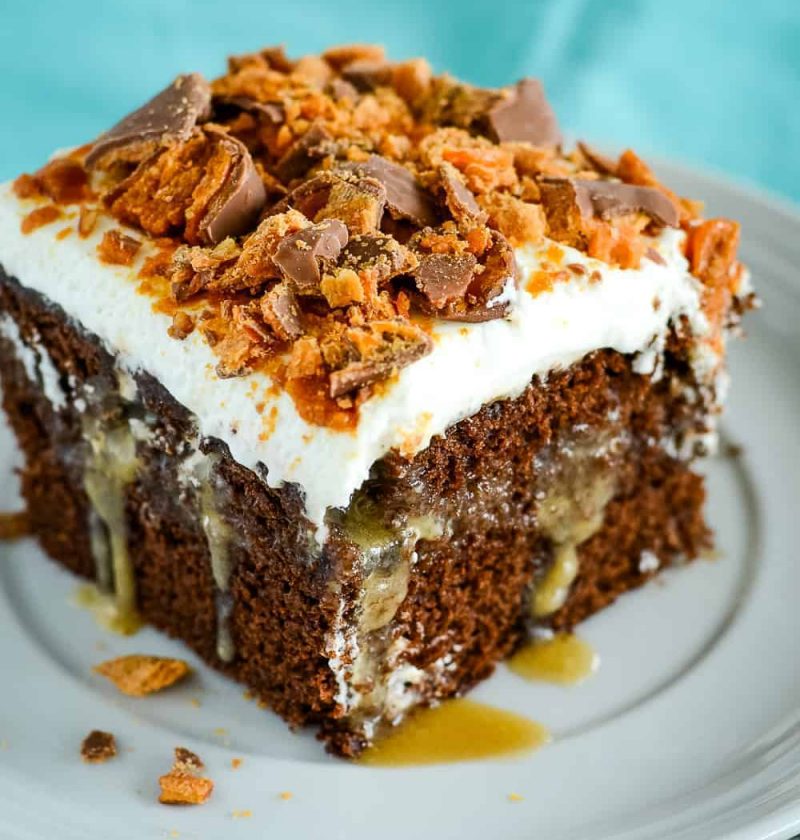
Get ready to embark on a sweet and crunchy journey with our Butterfinger Cake recipe. This delightful creation is a true indulgence for peanut butter enthusiasts. Imagine layers of moist cake infused with the rich flavors of peanut butter and topped with a luscious frosting, generously studded with crushed Butterfinger candy bars. With its perfect balance of sweetness and texture, this cake is guaranteed to satisfy your cravings and leave you wanting more.
Difficulty: Moderate
Prep Time: 30 minutes
Cooking Time: 25-30 minutes
Serving: 12-16 slices
Yield: 1 cake
Calories: Approximately 400 calories per slice
Ingredients:
- 2 cups all-purpose flour (240g)
- 1 1/2 teaspoons baking powder (7.5g)
- 1/2 teaspoon baking soda (2.5g)
- 1/4 teaspoon salt (1.25g)
- 1/2 cup unsalted butter, softened (113g)
- 1 cup granulated sugar (200g)
- 1/2 cup creamy peanut butter (120g)
- 2 large eggs
- 1 teaspoon vanilla extract (5ml)
- 1 cup buttermilk (240ml)
- 1 cup crushed Butterfinger candy bars (approximately 4 regular-sized bars)
Equipment:
- Mixing bowls
- Electric mixer or whisk
- 9-inch round cake pans (2)
- Parchment paper or cooking spray
- Cooling rack
Step-by-Step Guide:
Step 1: Prepare the Cake Batter
- Preheat your oven to 350°F (175°C) and grease or line two 9-inch round cake pans with parchment paper.
- In a mixing bowl, whisk together the flour, baking powder, baking soda, and salt. Set aside.
- In a separate bowl, cream together the softened butter, granulated sugar, and creamy peanut butter until light and fluffy.
- Add the eggs, one at a time, beating well after each addition. Stir in the vanilla extract.
- Gradually add the dry ingredients to the butter mixture, alternating with the buttermilk. Begin and end with the dry ingredients, mixing until just combined.
- Gently fold in the crushed Butterfinger candy bars, reserving a small portion for garnish.
Step 2: Bake the Cake Layers
- Divide the cake batter equally between the prepared cake pans, smoothing the tops with a spatula.
- Place the pans in the preheated oven and bake for 25-30 minutes or until a toothpick inserted into the center comes out clean.
- Once baked, remove the pans from the oven and allow the cakes to cool in the pans for about 10 minutes.
- Carefully transfer the cakes to a cooling rack to cool completely before frosting.
Step 3: Frost and Assemble the Cake
- Level the cooled cake layers using a serrated knife or cake leveler to create an even surface.
- Place one cake layer on a serving plate or cake stand. Spread a generous amount of frosting evenly over the top.
- Carefully place the second cake layer on top and frost the entire cake, covering the sides and the top with a thick layer of frosting.
- Garnish the cake with the reserved crushed Butterfinger candy bars, gently pressing them onto the sides and sprinkling some on top for an enticing presentation.
Step 4: Serve and Enjoy!
- Slice the Butterfinger Cake into generous portions, revealing the layers of moist cake and creamy frosting.
- Serve each slice with a tall glass of milk or a cup of coffee for a truly blissful experience.
- Relish the delightful combination of peanut butter flavors and the satisfying crunch of Butterfinger candy bars in every bite.
Tips and Tricks:
- For a more intense peanut butter flavor, use chunky peanut butter instead of creamy.
- If you don’t have buttermilk on hand, you can make your own by combining 1 cup of milk with 1 tablespoon of lemon juice or white vinegar. Let it sit for 5 minutes before using.
- To ensure even cake layers, tap the cake pans lightly on the counter before baking to release any air bubbles.
- For a smoother frosting finish, refrigerate the cake for 15-20 minutes after applying a thin crumb coat, then proceed with the final layer of frosting.
- Store any leftover cake in an airtight container in the refrigerator for up to 3 days. Allow it to come to room temperature before serving for the best taste and texture.
Nutritional Information:
Calories: Approximately 400
Fat: 20g
Carbohydrates: 49g
Protein: 8g
Fiber: 1
Final Thoughts:
Indulge in the decadence of our Butterfinger Cake, a peanut butter lover’s dream come true. From the moist and fluffy cake layers to the irresistible peanut butter frosting, every bite is a delightful blend of flavors and textures. The addition of crushed Butterfinger candy bars provides a satisfying crunch and a burst of sweetness that elevates this cake to a whole new level. Whether you’re celebrating a special occasion or simply treating yourself to a delightful dessert, this Butterfinger Cake is sure to impress and leave you craving more.
FAQ:
Q1: Can I use a different type of candy bar instead of Butterfinger?
A1: Absolutely! While Butterfinger candy bars add a unique flavor and texture to this cake, you can experiment with other candy bars of your choice. Snickers, Kit Kat, or even Reese’s Peanut Butter Cups can make excellent alternatives.
Q2: Can I make this cake in advance?
A2: Yes! You can bake the cake layers in advance and store them in an airtight container at room temperature for up to 2 days. Frost the cake on the day of serving for the best results.
Q3: Can I use natural peanut butter instead of regular peanut butter?
A3: Natural peanut butter tends to have a runnier consistency, which may affect the texture of the cake. It’s best to use regular creamy peanut butter for this recipe to ensure the proper structure and flavor.
Q4: Can I freeze the Butterfinger Cake?
A4: Yes, you can freeze the cake layers without frosting. Wrap them tightly in plastic wrap and place them in a freezer-safe bag or container. Thaw the layers in the refrigerator overnight before frosting and assembling the cake.
Q5: Can I use a different size of cake pans?
A5: If you use smaller cake pans, adjust the baking time accordingly as the layers will be thicker. Conversely, if you use larger pans, reduce the baking time slightly to prevent overcooking.
Q6: Is this cake suitable for people with nut allergies?
A6: Unfortunately, this recipe contains peanut butter and crushed Butterfinger candy bars, which may not be suitable for individuals with nut allergies. Consider alternative recipes that cater to specific dietary restrictions.
Q7: Can I add additional toppings or fillings to the cake?
A7: Absolutely! Feel free to get creative and add your favorite fillings or toppings. Caramel sauce, chocolate ganache, or even a layer of sliced bananas can complement the flavors of this cake beautifully.
Q8: Can I use a different frosting instead of peanut butter frosting?
A8: Of course! If you prefer a different frosting, you can use cream cheese frosting, chocolate ganache, or even a classic buttercream. Customize the cake to your taste preferences and enjoy the delicious result!