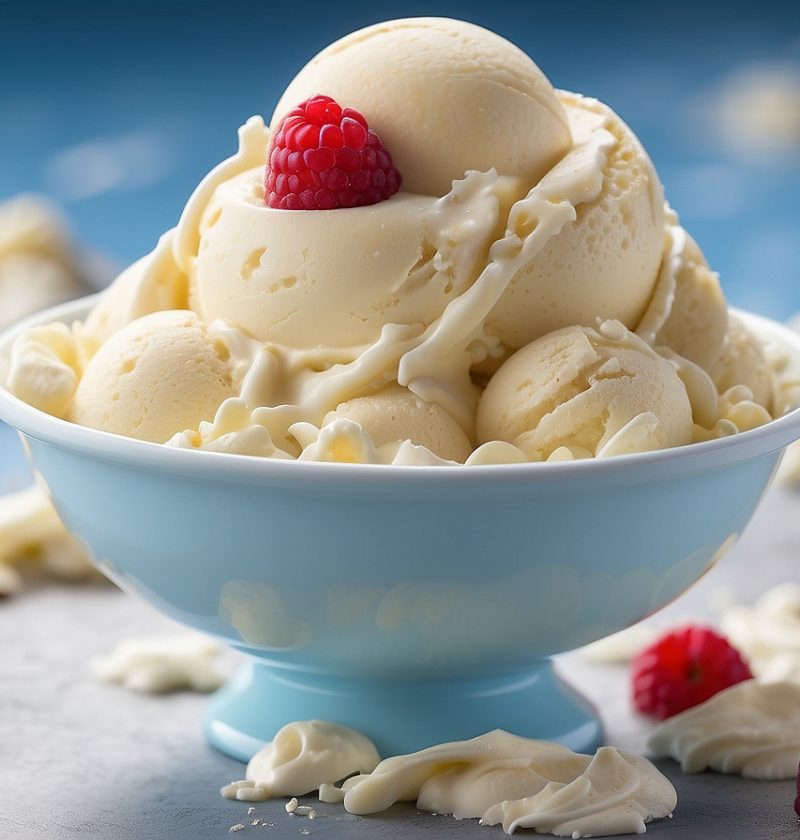
Indulge in the creamy goodness of Ninja Creami Vanilla Ice Cream! This delightful frozen treat will transport your taste buds to a realm of pure bliss. With its velvety texture and rich vanilla flavor, this homemade ice cream is a true dessert ninja that will leave you craving for more. Get ready to unleash your inner ice cream ninja and embark on a flavorful adventure!
- Difficulty: Easy
- Prep Time: 15 minutes
- Cooking Time: 30 minutes (plus freezing time)
- Serving: 4
- Yield: Approximately 1 quart
- Calories: 250 per serving
Ingredients
- 2 cups (480 ml) heavy cream
- 1 cup (240 ml) whole milk
- 3/4 cup (150 g) granulated sugar
- 1 tablespoon (15 ml) pure vanilla extract
- 1/4 teaspoon salt
- 4 large egg yolks
- 1/2 teaspoon ninja magic (optional but highly recommended)
- Ninja-themed sprinkles for garnish (because ninjas love a touch of whimsy)
Equipment
- Ninja Creami or any ice cream maker
- Mixing bowls
- Whisk
- Saucepan
- Rubber spatula
- Fine-mesh sieve
- Freezer-safe container
Step-by-Step Guide
Step 1: Pour the heavy cream and whole milk into a saucepan over medium heat. Heat the mixture until it reaches a gentle simmer, stirring occasionally.
Pro Tip: Don’t let it come to a boil. We’re aiming for a cozy simmer here.
Step 2: In a separate mixing bowl, whisk together the granulated sugar, vanilla extract, salt, and egg yolks until well combined and slightly thickened.
Step 3: Slowly pour the hot milk mixture into the egg yolk mixture, whisking constantly to prevent the eggs from scrambling. Pour the combined mixture back into the saucepan.
Step 4: Cook the mixture over medium heat, stirring constantly with a rubber spatula. Continue cooking until the mixture thickens and coats the back of the spatula. This should take about 5-7 minutes.
Step 5: Remove the saucepan from the heat and pour the mixture through a fine-mesh sieve into a clean bowl. This step helps to catch any lumps or cooked egg bits, leaving you with smooth and creamy ice cream base.
Step 6: Allow the ice cream base to cool for a few minutes, then cover it with plastic wrap, pressing it directly onto the surface to prevent a skin from forming. Chill the mixture in the refrigerator for at least 4 hours or overnight.
Step 7: Once the ice cream base is thoroughly chilled, it’s time to unleash the Ninja Creami! Follow the manufacturer’s instructions for your ice cream maker to churn the mixture into a creamy delight.
Step 8: While the ice cream is churning, sprinkle in a touch of ninja magic for an extra layer of flavor and intrigue. This secret ingredient will take your Ninja Creami Vanilla Ice Cream to the next level.
Step 9: Once the ice cream reaches a soft-serve consistency, transfer it to a freezer-safe container. Swirl in those ninja-themed sprinkles for a playful touch. Cover the container and freeze for at least 4 hours or until firm.
Step 10: When you’re ready to enjoy your Ninja Creami Vanilla Ice Cream, remove it from the freezer and let it sit at room temperature for a few minutes to soften slightly. Scoop into bowls or cones, and savor each ninja-approved bite.
Tips and Tricks
- For an extra ninja twist, try adding crushed chocolate ninja stars or mini cookie swords as mix-ins during the last few minutes of churning.
- Experiment with different flavors by infusing the milk with ingredients like mint leaves, coffee beans, or even a hint of cinnamon.
- To prevent ice crystals from forming, make sure your ice cream container is airtight and pressed tightly with plastic wrap before freezing.
- For a dairy-free alternative, swap the heavy cream and whole milk with coconut milk and coconut cream. Adjust the sweetness accordingly.
- Want to take your Ninja Creami Vanilla Ice Cream to the next level? Drizzle it with a homemade caramel or chocolate sauce and top it off with a dollop of whipped cream.
Nutritional Information
Per serving:
- Calories: 250
- Fat: 18g
- Carbohydrates: 20g
- Protein: 3g
- Fiber: 0g
Final Thoughts
Prepare to be captivated by the stealthy creaminess and enchanting vanilla flavor of Ninja Creami Vanilla Ice Cream. This recipe is your ticket to homemade frozen delight. Whether you’re enjoying it solo or sharing it with fellow ice cream enthusiasts, let this ninja-inspired treat bring joy and satisfaction to your taste buds.
FAQ
Q1: Can I use an ice cream maker other than Ninja Creami for Ninja Creami Vanilla Ice Cream?
A1: Absolutely! While this recipe is tailored for Ninja Creami, you can use any ice cream maker you have on hand. Simply follow the manufacturer’s instructions to achieve the desired results.
Q2: Can I substitute the granulated sugar with a sugar alternative in Ninja Creami Vanilla Ice Cream?
A2: Yes, you can experiment with sugar alternatives, keeping in mind that they may affect the texture and taste of Ninja Creami Vanilla Ice Cream. Adjust the quantity according to the sweetness level you desire.
Q3: Can I make Ninja Creami Vanilla Ice Cream without eggs?
A3: Yes, you can make eggless Ninja Creami Vanilla Ice Cream by omitting the egg yolks. However, note that the texture may be slightly different compared to the traditional custard-style ice cream.
Q4: How long can I store Ninja Creami Vanilla Ice Cream in the freezer?
A4: You can store Ninja Creami Vanilla Ice Cream in a freezer-safe container for up to 2 weeks. However, for the best taste and texture, it’s recommended to consume it within a few days of preparation.
Q5: Can I double the recipe to make a larger batch of Ninja Creami Vanilla Ice Cream?
A5: Certainly! Simply double the ingredients to yield a larger quantity of Ninja Creami Vanilla Ice Cream. Adjust the churning time accordingly based on the capacity of your ice cream maker.
Q6: Can I add mix-ins like chocolate chips or nuts to Ninja Creami Vanilla Ice Cream?
A6: Of course! Feel free to incorporate your favorite mix-ins, such as chocolate chips, crushed cookies, or chopped nuts, during the last few minutes of churning to add extra texture and flavor to Ninja Creami Vanilla Ice Cream.
Q7: Can I use this recipe to make other flavors of ice cream using Ninja Creami?
A7: Absolutely! This recipe serves as a versatile base that you can modify to create various flavors of ice cream using Ninja Creami. Consider adding extracts, fruits, or other flavorings to customize your frozen creations.
Q8: Can I use low-fat milk instead of whole milk in Ninja Creami Vanilla Ice Cream?
A8: While whole milk provides a richer and creamier texture, you can use low-fat milk as a substitute in Ninja Creami Vanilla Ice Cream. However, note that the final result may be slightly less creamy.
Q9: Can I make Ninja Creami Vanilla Ice Cream without an ice cream maker?
A9: While an ice cream maker yields the best results, you can still achieve a similar texture in Ninja Creami Vanilla Ice Cream by pouring the chilled ice cream base into a shallow container, freezing it, and vigorously whisking it every 30 minutes until it reaches the desired consistency.
Q10: Can I make Ninja Creami Vanilla Ice Cream vegan?
A10: This particular recipe for Ninja Creami Vanilla Ice Cream contains dairy ingredients and eggs. However, there are numerous vegan ice cream recipes available that use plant-based milk, such as almond or coconut milk, as a substitute for dairy milk. Explore those options for a vegan-friendly version of Ninja Creami Vanilla Ice Cream.
Q11: Can I use alternative flavors instead of vanilla in Ninja Creami Vanilla Ice Cream?
A11: Absolutely! Ninja Creami Vanilla Ice Cream serves as a versatile base, and you can experiment with different flavors by substituting the vanilla extract with other extracts or flavorings of your choice. Get creative and let your taste buds guide you!
Q12: Can I use Ninja Creami Vanilla Ice Cream as a base for milkshakes or ice cream sundaes?
A12: Definitely! Ninja Creami Vanilla Ice Cream makes a fantastic base for indulgent milkshakes or delightful ice cream sundaes. Add your favorite toppings, sauces, and extras to create a customized frozen treat experience.
Q13: Can I make Ninja Creami Vanilla Ice Cream without using any sweeteners?
A13: While sweeteners contribute to the classic flavor of Ninja Creami Vanilla Ice Cream, you can experiment with reducing or omitting them. Keep in mind that without sweeteners, the ice cream will have a less sweet taste and may affect the texture.
Q14: Can I use Ninja Creami Vanilla Ice Cream to make ice cream sandwiches?
A14: Absolutely! Ninja Creami Vanilla Ice Cream can be used to make delicious ice cream sandwiches. Simply sandwich a scoop of the ice cream between your favorite cookies, and enjoy the delightful combination of flavors and textures.
Q15: Can I customize the texture of Ninja Creami Vanilla Ice Cream by adjusting the churning time?
A15: Yes, the churning time can impact the texture of Ninja Creami Vanilla Ice Cream. If you prefer a softer consistency, you can reduce the churning time. For a firmer texture, extend the churning time. Experiment to find your perfect balance.