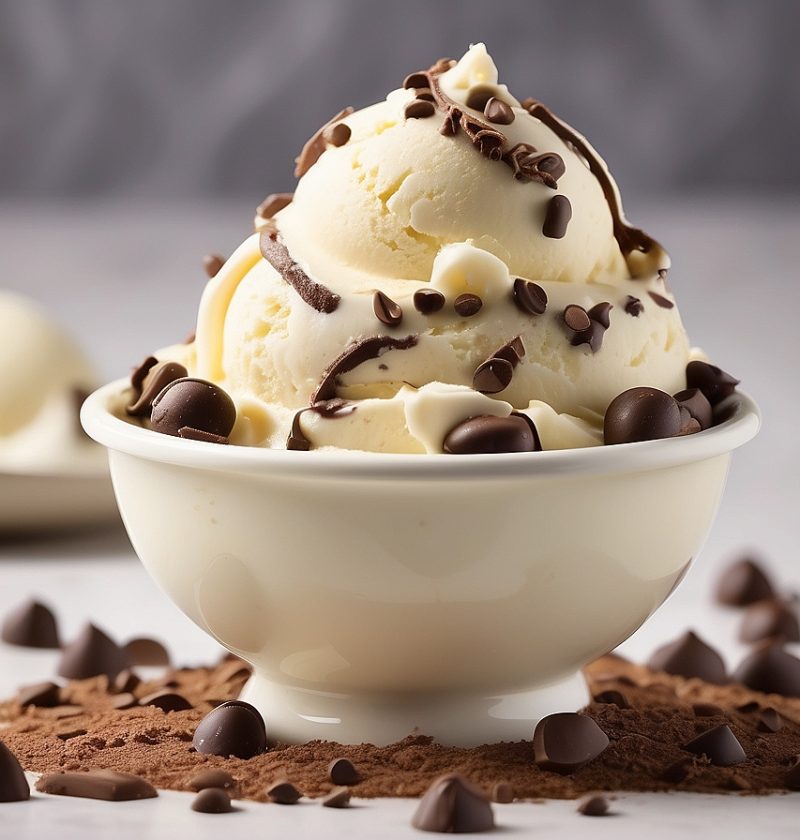
Indulge in the velvety smoothness of Cottage Cheese Ice Cream, a delightful frozen treat that combines the richness of cream with the wholesome goodness of cottage cheese. This unique ice cream recipe offers a refreshing twist on the classic dessert, providing a creamy texture and a subtle tangy flavor. Packed with protein and lower in fat than traditional ice cream, Cottage Cheese Ice Cream is a guilt-free indulgence that will satisfy your sweet tooth while keeping you cool on hot summer days. Get ready to experience a burst of creamy goodness in every spoonful!
Difficulty: Easy
Prep Time: 15 minutes
Cooking Time: 0 minutes (churning time required)
Serving: 6
Yield: Approximately 1.5 quarts of Cottage Cheese Ice Cream
Calories: Approximately 200 calories per serving
Ingredients:
- 2 cups (475ml) cottage cheese
- 1 cup (240ml) whole milk
- 1 cup (240ml) heavy cream
- 3/4 cup (150g) granulated sugar
- 1 teaspoon (5ml) vanilla extract
- Pinch of salt
- Optional mix-ins (chocolate chips, fruit, nuts, etc.)
Equipment:
- Blender or food processor
- Ice cream maker
- Mixing bowl
- Whisk
- Rubber spatula
- Freezer-safe container
Step-by-Step Guide:
Step 1:
In a blender or food processor, combine the cottage cheese, whole milk, heavy cream, granulated sugar, vanilla extract, and a pinch of salt. Blend until smooth and well combined.
Step 2:
Pour the mixture into a mixing bowl and refrigerate for at least 1 hour to chill completely. This step allows the flavors to meld together and ensures a smoother consistency during churning.
Step 3:
Once chilled, remove the mixture from the refrigerator and give it a good whisk to ensure it is well blended. Transfer the mixture to your ice cream maker and churn according to the manufacturer’s instructions until it reaches a soft-serve consistency.
Step 4:
If desired, add any mix-ins, such as chocolate chips, fruit, or nuts, during the last few minutes of churning. This will add extra texture and flavor to your Cottage Cheese Ice Cream.
Step 5:
Using a rubber spatula, transfer the churned ice cream into a freezer-safe container. Smooth the surface with the spatula, cover the container, and place it in the freezer for at least 4 hours or until firm.
Tips and Tricks:
- For a smoother texture, you can strain the cottage cheese before blending it with the other ingredients. Simply place the cottage cheese in a fine-mesh strainer set over a bowl and let it drain in the refrigerator for a couple of hours before using it in the recipe.
- Experiment with different mix-ins to customize your Cottage Cheese Ice Cream. Try adding crushed cookies, caramel swirls, or even a drizzle of honey for a touch of sweetness.
- If you don’t have an ice cream maker, you can still make Cottage Cheese Ice Cream. After Step 2, pour the mixture into a shallow dish and freeze it. Every 30 minutes, remove the dish from the freezer and vigorously stir the mixture with a fork to break up any ice crystals. Repeat this process 3-4 times until the ice cream reaches a creamy consistency.
- To prevent ice crystals from forming on the surface of your ice cream, press a piece of plastic wrap directly onto the surface before covering the container. This will create a barrier and help maintain the creaminess of the ice cream.
- Allow the frozen ice cream to soften at room temperature for a few minutes before scooping. This will make it easier to serve and ensure a smoother texture.
Nutritional Information:
Calories: Approximately 200 calories per serving
Fat: 12g
Carbohydrates: 18g
Protein: 7g
Fiber: 0g
Final Thoughts:
Cottage Cheese Ice Cream is a delightful twist on the classic frozen treat, offering a creamy and tangy flavor that will leave you craving more. With its protein-packed cottage cheese base, this ice cream is a guilt-free indulgence that satisfies your sweet tooth while providing a hint of wholesome goodness. Treat yourself to a scoop (or two) of this creamy delight and savor the unique flavors that Cottage Cheese Ice Cream has to offer.
FAQ:
Q1: Can I use low-fat cottage cheese instead of regular cottage cheese?
A1: Yes, you can use low-fat cottage cheese if you prefer a lighter version of the ice cream. However, keep in mind that it may affect the creaminess and texture of the final product.
**Q2: Can I substitute the whole milk with a different typeof milk?
A2: While whole milk provides a richer flavor and creamier texture, you can use a lower-fat milk, such as 2% or skim milk, if desired. Just keep in mind that it may result in a slightly less creamy consistency.
Q3: How long can I store Cottage Cheese Ice Cream in the freezer?
A3: Cottage Cheese Ice Cream can be stored in the freezer for up to 2 weeks. However, for the best texture and flavor, it is recommended to consume it within the first week.
Q4: Can I make this recipe without an ice cream maker?
A4: Yes, you can still make Cottage Cheese Ice Cream without an ice cream maker. Follow the alternative freezing method mentioned in Step 5, and make sure to stir the mixture every 30 minutes to break up ice crystals and achieve a creamy consistency.
Q5: Can I use flavored cottage cheese for this recipe?
A5: While you can experiment with flavored cottage cheese, keep in mind that it will alter the taste of the ice cream. The natural flavor of cottage cheese allows for more versatility in adding mix-ins and creating your desired flavor profile.
Q6: Can I use alternative sweeteners, such as honey or maple syrup, instead of granulated sugar?
A6: Yes, you can substitute granulated sugar with honey or maple syrup. However, bear in mind that it may affect the texture and freezing properties of the ice cream. Adjust the quantity to taste and consider the consistency of the sweetener you are using.
Q7: Can I use this recipe as a base for other ice cream flavors?
A7: Absolutely! This recipe serves as a versatile base for various ice cream flavors. Feel free to experiment by adding different extracts, fruits, or other mix-ins to create your favorite combinations.
Q8: Can I use a hand mixer instead of a blender or food processor?
A8: While a blender or food processor is recommended for blending the ingredients smoothly, you can use a hand mixer as an alternative. Make sure to mix the ingredients thoroughly to achieve a creamy and well-combined mixture before chilling and churning.
